
Docker Compose is a tool for defining and running multi-container Docker applications. When to create it, use a YAML file to configure the services of your application. Then a single, command creates and starts all services from the configuration.
Basically, the use of creation is a three-step process:
- Use Dockerfile to define your app’s environment so that it can be replicated anywhere.
- Define the services that make up your app in docker-compose.yml so they can run
Together in an isolated environment. - Running docker-compose up will launch Compose and run the entire app.
A docker-compose.yml looks like this:
version: '3'
services:
web:
build: .
ports:
- "5000:5000"
volumes:
- .:/code
- logvolume01:/var/log
links:
- redis
redis:
image: redis
volumes:
logvolume01: {}
Install Docker Compose
Prerequisites:
Docker Compose relies on Docker Engine for meaningful work, so make sure you’ve done it
Docker Engine can be installed locally or remotely, depending on your setup.
1. Run the following command to download the latest stable version of Docker Compose.
sudo curl -L "https://github.com/docker/compose/releases/download/1.24.0/docker-
compose-$(uname -s)-$(uname -m)" -o /usr/local/bin/docker-compose
2. Apply executable permissions to the binary.
sudo chmod +x /usr/local/bin/docker-compose3. Test the installation.
docker-compose --versionDocker-compose example
A simple Python web application that runs on Docker Compose. Application uses flask to Create a framework and manage hit counters in Redis. This example uses Python, but the concept is as follows:
What is shown here should be understandable even if you are not familiar with it.
Make sure you already have Docker Engine and Docker Compose installed. You don’t have to
Install Python or Redis. Both are provided by the Docker image.
Step 1: Setup
1. Create a directory for the project.
$ mkdir composetest
$ cd composetest
2. Create a file called app.py in your project directory and paste this in:
import time
import redis
from flask import Flask

app = Flask(__name__)
cache = redis.Redis(host='redis', port=6379)

def get_hit_count():
retries = 5
while True:
try:
return cache.incr('hits')
except redis.exceptions.ConnectionError as exc:
if retries == 0:
raise exc
retries -= 1
time.sleep(0.5)

@app.route('/')
def hello():
count = get_hit_count()
return 'Hello World! I have been seen {} times.\n'.format(count)

if __name__ == "__main__":
app.run(host="0.0.0.0", debug=True)
In this example, redis is the host name of the redis container on your application’s network. we use Redis default port, 6379.
Explanation:
Notice how the get_hit_count function is written. This basic repeating loop leaves us
If the Redis service is not available, try your request multiple times. This is useful when launching an application when it is online, but it also enhances the resilience of the application if the Redis service needs to be restarted at any point during the life of the application. In a cluster, this is also useful for handling temporary disconnections between nodes.
3. Create and paste another file called requirements.txt in your project directory.
flask
redis
Step 2: Create a Dockerfile
In this step, you will create a Dockerfile to build the Docker image. The photo contains everything dependencies required for Python applications, including Python itself.
Create a file called Dockerfile in your project directory and paste the following:
FROM python:3.4-alpine
ADD . /code
WORKDIR /code
RUN pip install -r requirements.txt
CMD ["python", "app.py"]
Explanation
- Create an image that starts with a Python 3.4 image.
- Add the current directory . into the path/code in the image.
- Set your working directory to/code.
- Install Python dependencies.
- Set the default command for the container to pythonapp.py.
Step 3: Define services in a Compose file
Create a file named docker-compose.yml in your project directory and paste the following:
version: '3'
services:
web:
build: .
ports:
- "5000:5000"
redis:
image: "redis:alpine"
Explanation
This creation file defines two services, web and redis. Web service:
- Use the image built from the Dockerfile in the current directory.
- Forward the container’s exposed port 5000 to port 5000 on the host machine. we use the default Flask web server port, 5000.
The Redis service uses a public Redis image obtained from the Docker Hub registry.
Step 4: Build and run your app with Compose
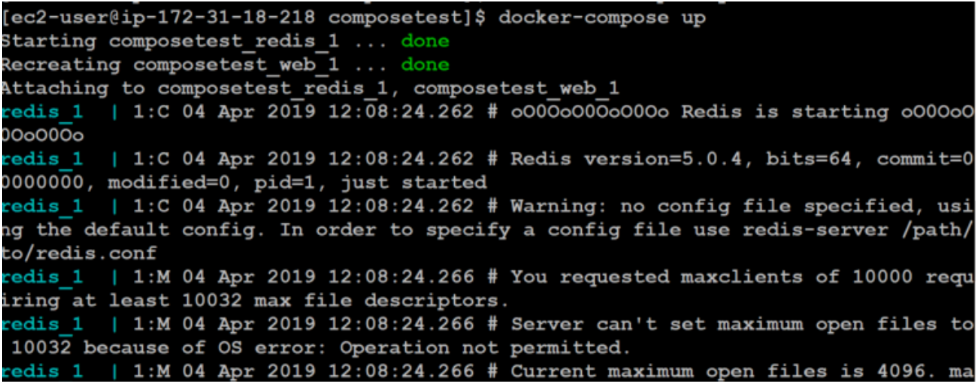
1. In the project directory, run docker-compose up to launch the application
$ docker-compose upSample log
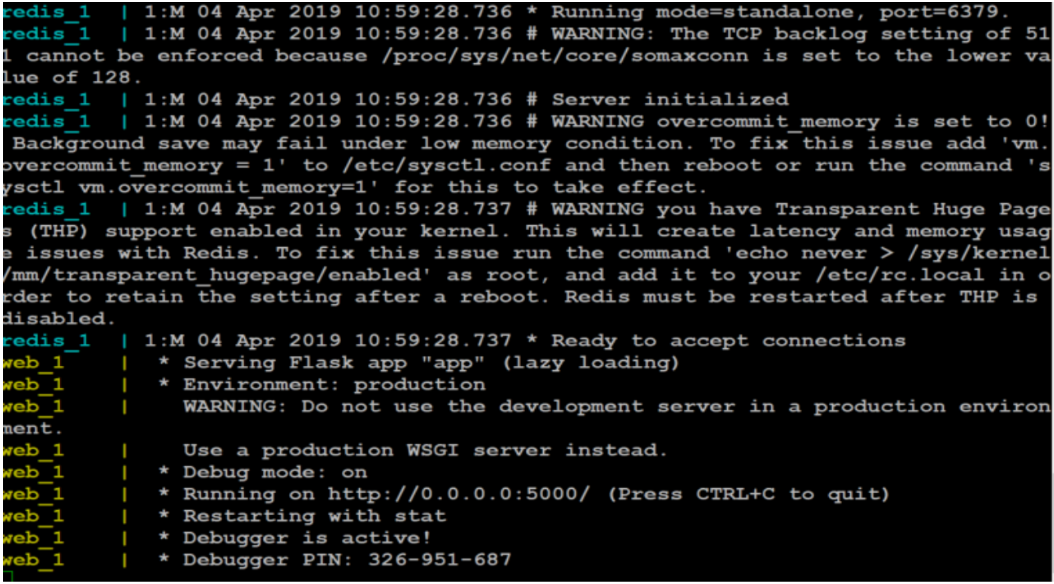
2. open http://MACHINE_IP:5000 in a browser.
3. Refresh the page.
4. The number should increment.

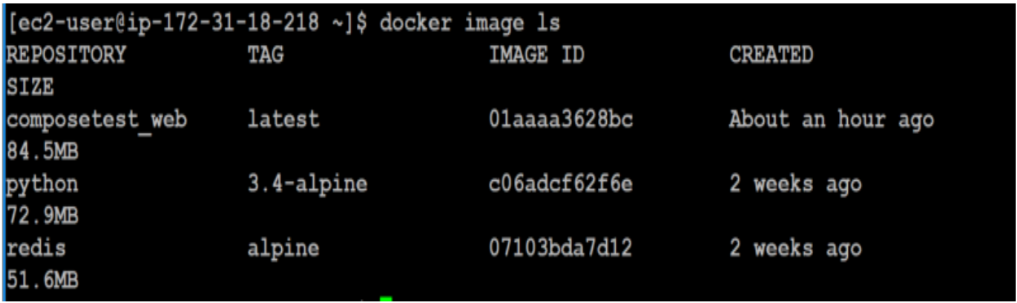
5. Switch to another terminal window and type docker image ls to list the local images.
6. Run docker-compose down in your project to stop the application press CTRL+C in the directory on the second terminal, or on the original terminal where you started the app.
Step 5: Edit the Compose file to add a bind mount
Edit docker-compose.yml in your project directory to add a bind mount for your web service:
version: '3'
services:
web:
build: .
ports:
- "5000:5000"
volumes:
- .:/code
redis:
image: "redis:alpine"
The new volumes key mounts the project directory (current directory) on the host to /code inside the container, allowing you to modify the code on the fly, without having to rebuild the image.
Step 6: Re-build and run the app with Compose
In the project directory, type docker-compose up to build the app with the updated to Create and run the file.
Check the Hello World message again in your web browser and update to see the count growth.
Step 7: Update the application
Now that the application code is mounted on the container using the volume, you can do this and make changes to your code and see the changes immediately without having to rebuild the image.
1. Change the greeting to app.py and save it. For example, change Hello
world! Message from Docker to Hello! :
return 'Hello from Docker! I have been seen {} times.\n'.format(count)2. Update the app in your browser. I need to update the greeting and update the counter should still increase.

Step 8: Experiment with some other commands
If you want the service to run in the background, you can pass the -d flag (in the case of “detached” mode) Run docker-compose and use docker-compose ps to see what is running.
$ docker-compose up -d
$ docker-compose ps
The docker-compose run command allows you to run one-off commands for your services. For
example, to see what environment variables are available to the web service:
$ docker-compose run webIf you started Compose with docker-compose up -d, stop your services once you’ve finished
with them:
$ docker-compose stop
You can use the down command to shut down everything and remove the container permanently.
Pass –volumes to also delete the data volumes used by your Redis container:
$ docker-compose down --volumes