In this tutorial, we are going to see how to set up Git. At the heart of GitHub is an open-source version control system (VCS). It’s called Git. Git is associated with GitHub and is responsible for everything that occurs locally on your machine.
Git Installation in ubuntu:
The easiest way to start and run Git is to use Ubuntu default repositories. This is the fastest method, but the version may be older than the latest version. If you need the latest version, follow the steps to compile Git from the source.
You can use the apt package management tool to update the local package index. After that, You can download and install the program:
$ sudo apt-get update
$ sudo apt-get install git
After the installation completes successfully, check to see if you have the git version installed.
$git --versionGit installtion in CentOS:
Use yum, CentOS’s native package manager, to find and install the latest Git packages available in CentOS repositories:
$ yum install git -yGit architecture:
After installing git, there are some things you need to do to ensure that the committed messages generated contain the correct information.
The easiest way to do this is to use the git-config command. In particular, git embeds this information in every commit it makes, so you need to provide your name and email address. You can add this information by typing:
$ git config --global user.name "Your Name"
$ git config --global user.email "youremail@domain.com"
You can see all the configured configuration items by typing:
$ git config --listThe output looks like this:
user.name = your name
user.email=youremail@domain.com
As you can see, this is a slightly different format. The information is stored in the configuration file. The configuration file can optionally be edited manually using a text editor as follows:
$ nano ~/.gitconfigCreating your workspace
The same idea applies to where your code, just as you would need a clean working environment. Especially if you are contributing to multiple projects at the same time. It’s a good idea to create a folder called git in your home directory and include subfolders for each individual project.
First, you need to create a workspace environment:
$ mkdir -p ~/git/JMStechhome ; cd ~/git/JMStechhome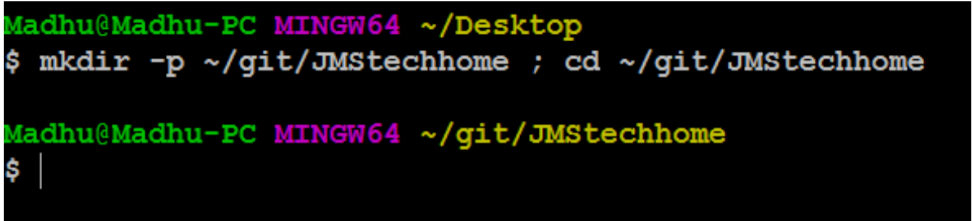
The above command does two things: 1) Create a directory called “git” in your home directory, then a subdirectory called “JMStechhome” (where your project is actually saved). 2) Change to the project base directory.
After moving to this directory, you need to create some files to include in your project. In this step, you can join and create some dummy files for testing purposes, or you can create the files/directories you want to be part of your project.
Create a text file for use in the repository:
~/git/JMStechhome $ touch madhu.txt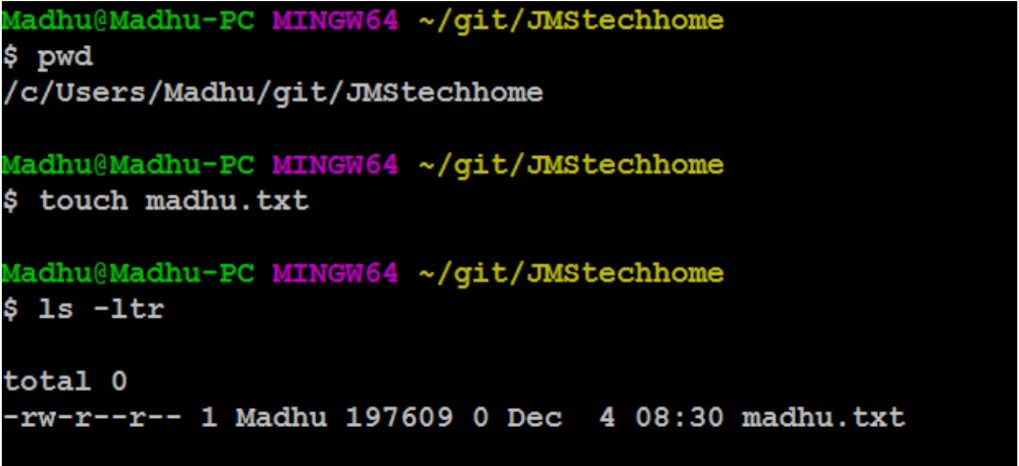
Once all your project files are in your workspace, you need to start tracking files using Git. The next step describes this process.
Convert an existing project to a work environment
Once all the files are in your Git workspace, you need to tell Git that you want to use your current directory as your Git environment.
~/git/JMStechhome $ git init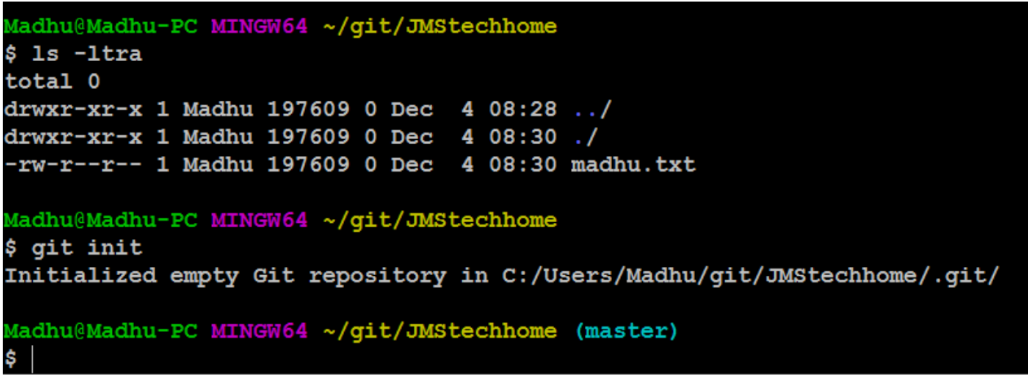
After initializing Git, a .git folder will be created. The workspace is now called a git project. After initializing the new empty repository, you can add the files.
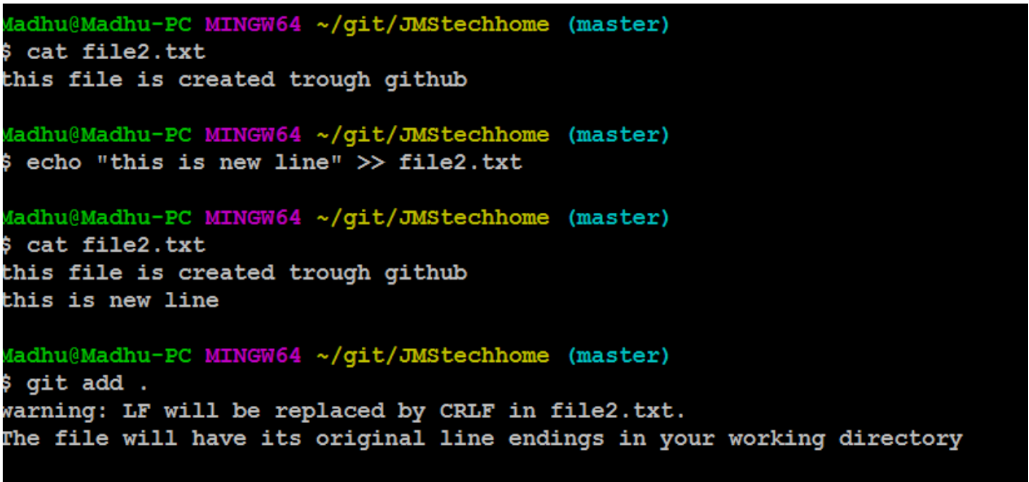
The following will add all files and directories to your newly created repository:
~/git/JMStechhome $ git add .
In this case, no output is good output. Unfortunately, git doesn’t always notify you when something goes wrong — ahhaaaaaaaaaaa
You need to create a commit message every time you add or modify a file.
Creating a commit message
Commit messages are short messages that describe the changes you have made. it is necessary
It’s a good way to do that before submitting your coding changes (this is called a push) Tell your co-developer what to expect from the change. This section describes How to create them. Commit messages are generally fairly short, one or two sentences, what do you explain?
I made your change. It’s a good idea to commit to all your changes before pushing. You can push as many commits as you like. The only requirement for each commit is that it contains at least one file and contains a message. Push requires at least one commit.
~/git/JMStechhome $ git commit -m "Initial Commit" –a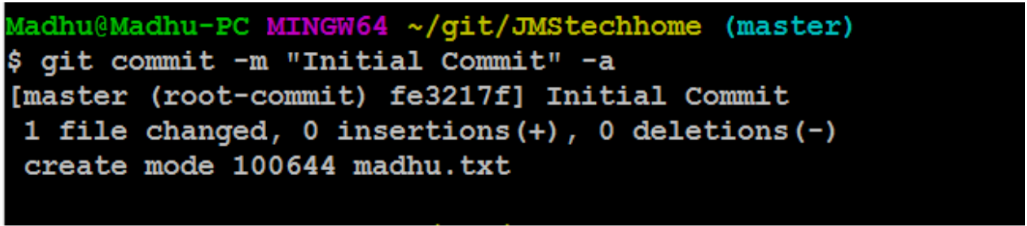
The above command has two important parameters. The first is -m, which means Followed by a commit message (in this case “initial commit”). Second, -a means that you need to apply the commit message to all the files that have been added or modified. This is fine for the first commit, but generally, you need to specify the individual files or directories to commit.
We should have done it too:
~/git/JMStechhome $ git commit -m "Initial Commit" <file_name>Specifies the specific file to commit. To add a file or directory, simply add a space-separated list at the end of this command.
~/git/JMStechhome $ git commit -m "Initial Commit" <file_name1> <file_name2>Pushing changes to a remote server
Up to this point, I’ve done everything on my local server. If you need an easy way to version your files, this is certainly an option to use git locally. However, if you work with a team of developers, you need to push your changes to a remote server. This section describes how to do this. The first step in being able to port your code to a remote server is to provide the URL.
The repository exists and is named. To configure the remote repository to use and display a list of all remotes (there may be more than one), type:
Setup GitHub account:
Step1: sign-up the GitHub account.
Step2: confirm your git hub account through your mail.
Step3: then create a repository in GitHub with our main folder name of the git project.
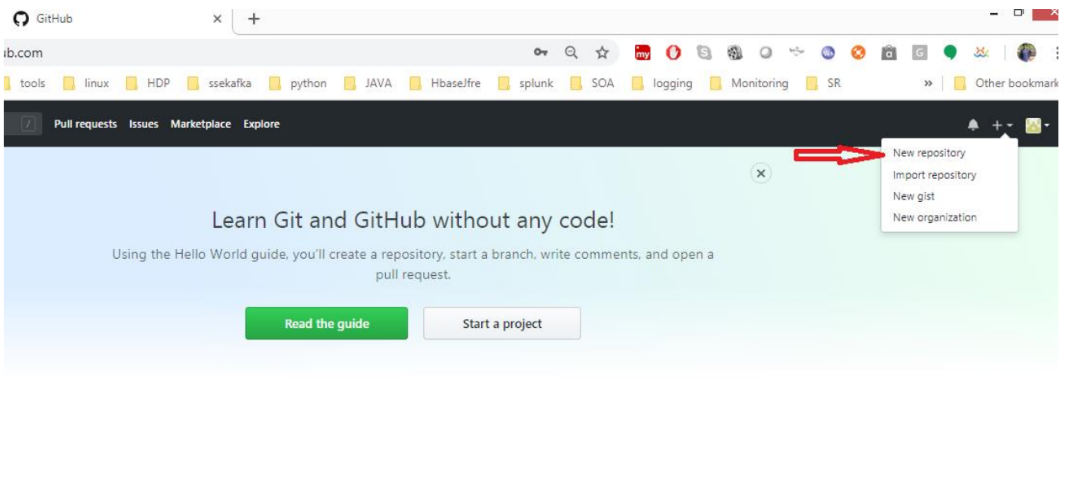
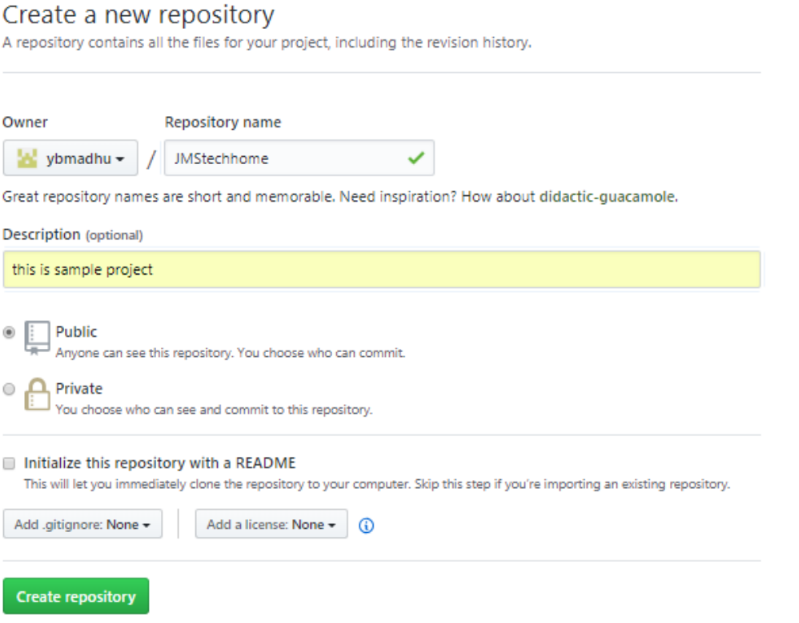
Click the Crete Repository button to create a repository in your Github account.
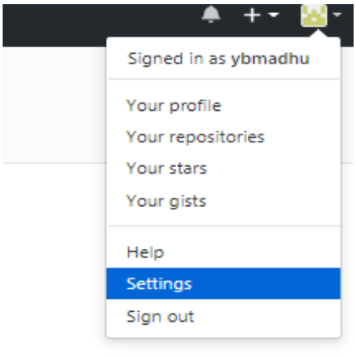
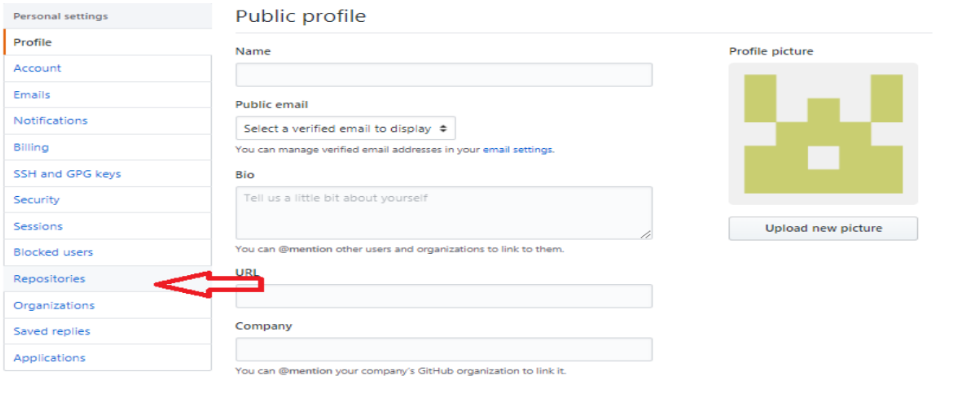
If you want to check your repository list go to your profile –>settings –> then see the right-side
In the panel, you will get repository lists.
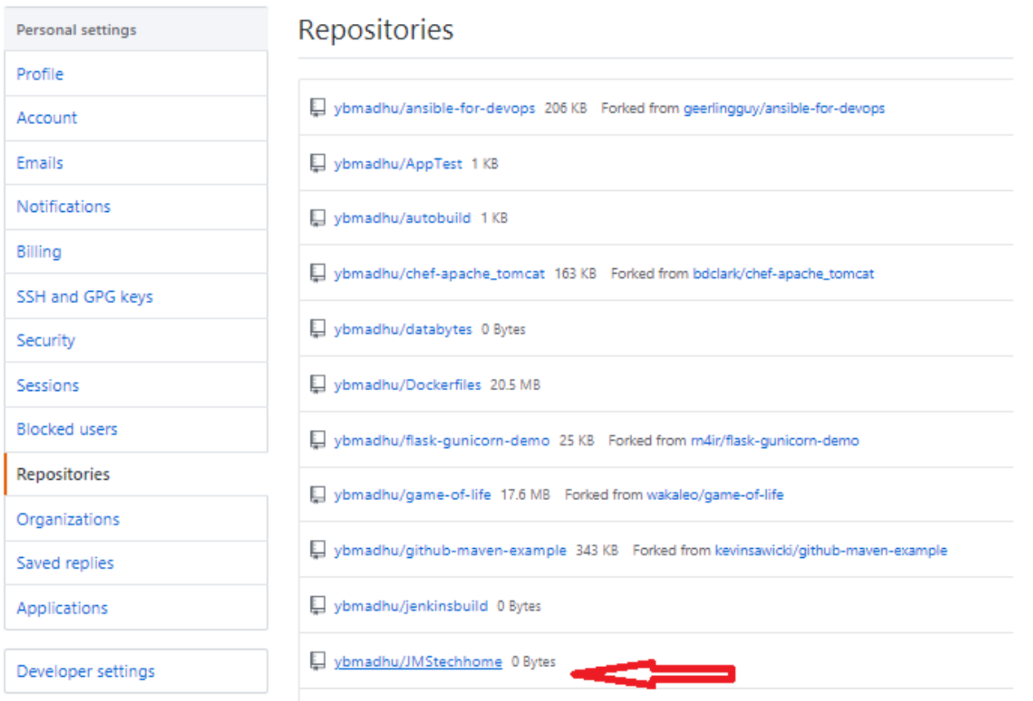
Click the repository to see the structure of the project and the URL of the repository. For new repositories, you will see some instructions on what to do.

If you click the copy icon it will copy the URL. And we need to configure this URL in our local machine.
Then go to your project’s git bash terminal and add the URL as shown below. The URL of the Mygithub repository looks like this:
https://github.com/USERNAME/REPOSITORY.git (or)
ssh://git@github.com:USERNAME/REPOSITORY.git
$ git remote add origin https://github.com/ybmadhu/JMStechHome.gitto check the remote repositories use the below command.
The first command adds a remote called “origin” and sets the URL as follows: You can give the remote any name you like, but the URL must point to the actual remote repository. For example, if you send your code to GitHub, you’ll need to use the URL of the repository provided.
After setting the remote control, you can enter the code.
You can push code to a remote server by typing the following:
$ git push origin master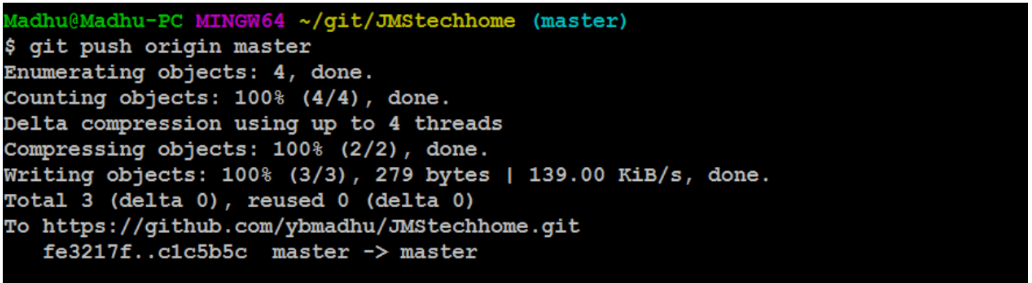
if you face an issue like below
$ git push origin masterThe authenticity of host ‘github.com (192.30.253.113)’ can’t be established.
RSA key fingerprint is SHA256:nThbg6kXUpJWGl7E1IGOCspRomTxdCARLviKw6E5SY8.
Are you sure you want to continue connecting (yes/no)? yes
Warning: Permanently added ‘github.com,192.30.253.113’ (RSA) to the list of known hosts.
Permission denied (publickey).
fatal: Could not read from remote repository.
Please make sure you have the correct access rights
and that the repository exists.
Answer:
You need to authenticate yourself before you can push the code. Push using HTTPS URL After entering the code, you will be prompted for a username and password for your Github account.
$ git remote set-url origin https://github.com/ybmadhu/JMStechhome.git
$ git remote -v
origin https://github.com/ybmadhu/JMStechhome.git (fetch)
origin https://github.com/ybmadhu/testing.git (push)
$ git push origin masterUsername for ‘https://github.com‘: ybmadhu
Password for ‘https://ybmadhu@github.com‘:
Counting objects: 3, done.
Writing objects: 100% (3/3), 207 bytes | 0 bytes/s, done.
Total 3 (delta 0), reused 0 (delta 0)
To https://github.com/ybmadhu/JMStechhome.git
- [new branch] master -> master
Then check if your git hub account is in the particular repository where the files were successfully pushed
or not. “git push” tells git to push changes. “Origin” is the name of the newly constructed one.
The remote server and “master” are the names of the first branch. If you have future commits that you want to push to the server, you can simply use “git push”.
Next, there are new requirements. Then you need to modify the same file or create a new one in the same project.
Next, edit the file or create a new file in the same project. Then use the following command to check the status of the project and the modified files.
madhu@madhu-VirtualBox:~/git/testing$ git statusOn branch master
Changes are not staged for commit:
(use “git add …” to update what will be committed)
(use “git checkout — …” to discard changes in the working directory)
modified: fileno changes added to commit (use “git add” and/or “git commit -a”).
Then we need to commit the changes in the local workspace and then after push to remote repository.
$ git add .
$ git commit -m “this is sencond change” -a
[master 1fcc24d] this is sencond change
1 file changed, 1 insertion(+)
- Push the code to the remote repository using the following command:
$ git push origin masterUsername for ‘https://github.com‘: ybmadhu
Password for ‘https://ybmadhu@github.com‘:
Counting objects: 5, done.
Writing objects: 100% (3/3), 257 bytes | 0 bytes/s, done.
Total 3 (delta 0), reused 0 (delta 0)
To https://github.com/ybmadhu/JMStechhome.git
9dd2953..1fcc24d master -> master
madhu@madhu-VirtualBox:~/git/testing$ git statusOn branch master
nothing to commit, working directory clean.
- How to check user activity using the log command. Think of Git’s logs as a journal Remembers all previously committed changes in the order in which they were committed.
$ git logcommit 1fcc24deeb90ba6bfd2af01e05805e622d7f3c84
Author: ybmadhuybmadhu707@gmail.com
Date: Thu Dec 14 15:50:42 2017 +0530
this is sencond change
commit 9dd29534376ca19714ae649e098435b5d0ed4927
Author: ybmadhuybmadhu707@gmail.com
Date: Thu Dec 14 13:41:14 2017 +0530
Initial Commit
Pulling Remotely
Let’s pretend to be a while. Invited others to the GitHub project that did this
I pulled the changes, made my own commit, and pushed.
You can search the GitHub repository for changes and do the following to get all the new changes:
- if there are no changes in the remote repository the out looks like this
$ git pull origin master
$ git pull origin master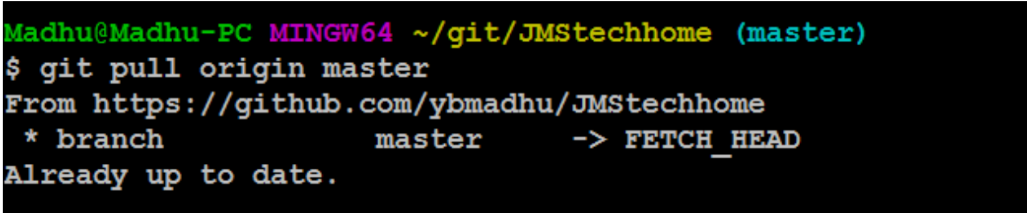
- if any changes in the remote repository the output looks like the below.
madhu@madhu-VirtualBox:~/git/testing$ git pull origin master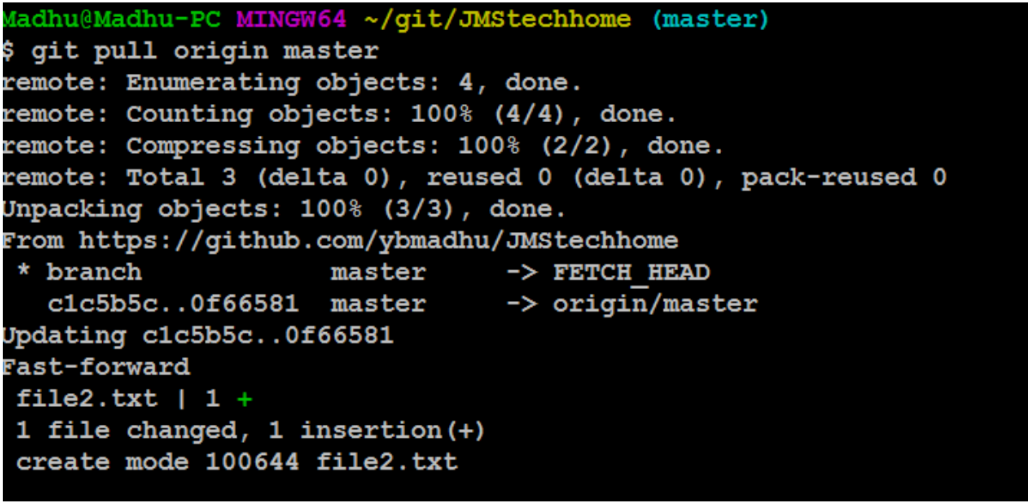
Git Differences
Let’s see the difference from the previous commit using the git diff command.
In this case, you need the diff of the last commit. You can send this to HEAD Pointer.
$ git diff HEAD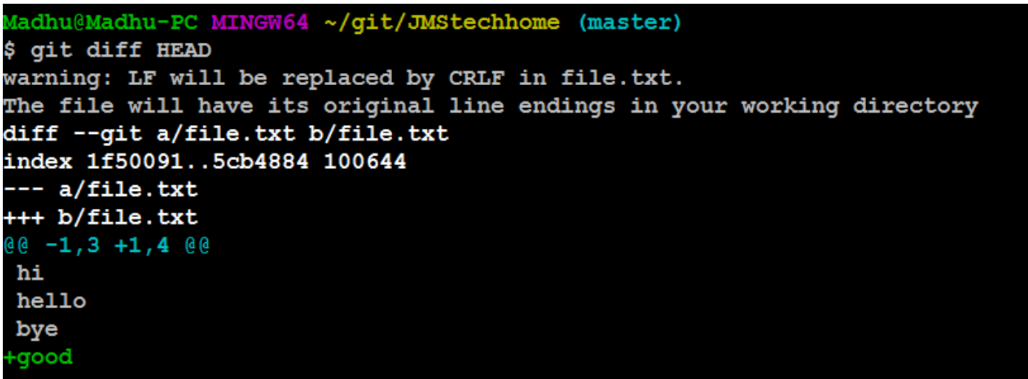
Staged Differences
Another great use of diff is to show changes in files that have already been deployed.
Remember that staging files are files that Git is ready to notify and commit.
Staged Differences (cont’d)
Now go ahead and run git diff with the –staged option to see the changes you just staged.
$ git diff --staged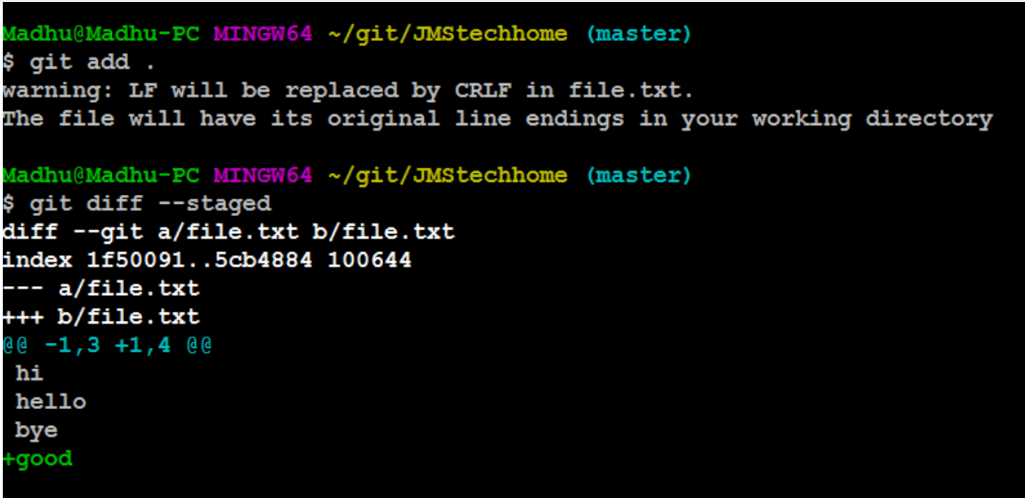
Undoing the Last Commit:
Suppose you want to remove the last commit because the code is wrong. Now I want to be my
Committed code. In this scenario, use the git reset command as follows:
There are two options to undo: 1. -Soft and Hard.
- If I use –soft option we can undo the last committed changes but the code is still available in
you’re local. - If I use the –hard option we can undo the last committed changes and the latest code also deleted
- in your local.


Undo
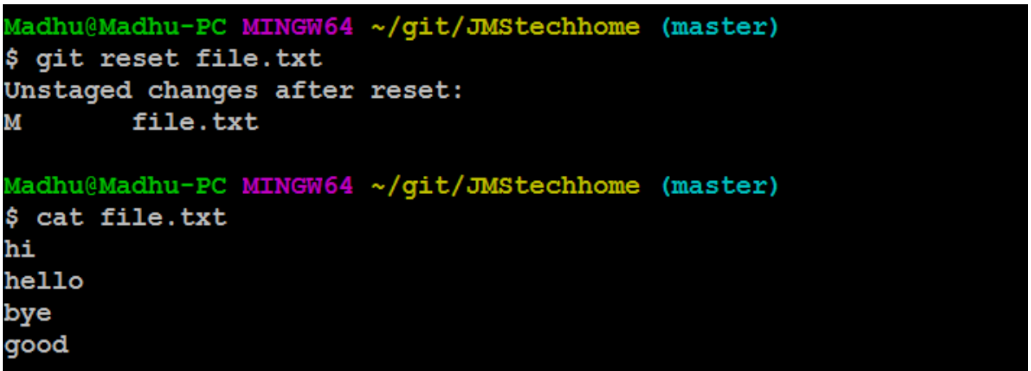
Files can be changed back to how they were at the last commit by using the command: git
checkout — <target>.
madhu@madhu-VirtualBox:~/git/testing$ git checkout -- file