In this topic, you will learn how to install and integrate Nexus with Jenkins on your Windows computer.
Jenkins uploads the Maven artifact to the Nexus repository.
First, download the Nexus Manager form from the link below
https://help.sonatype.com/repomanager3/download
For Windows,
https://download.sonatype.com/nexus/3/latest-win64.zip
now extract the zip file and go to the path of extracted folder bin/nexus.exe
the run below command nexus.exe /run

Once the Nexus server runs successfully, open your favorite browser. Open using the link below
Nexus dashboard.
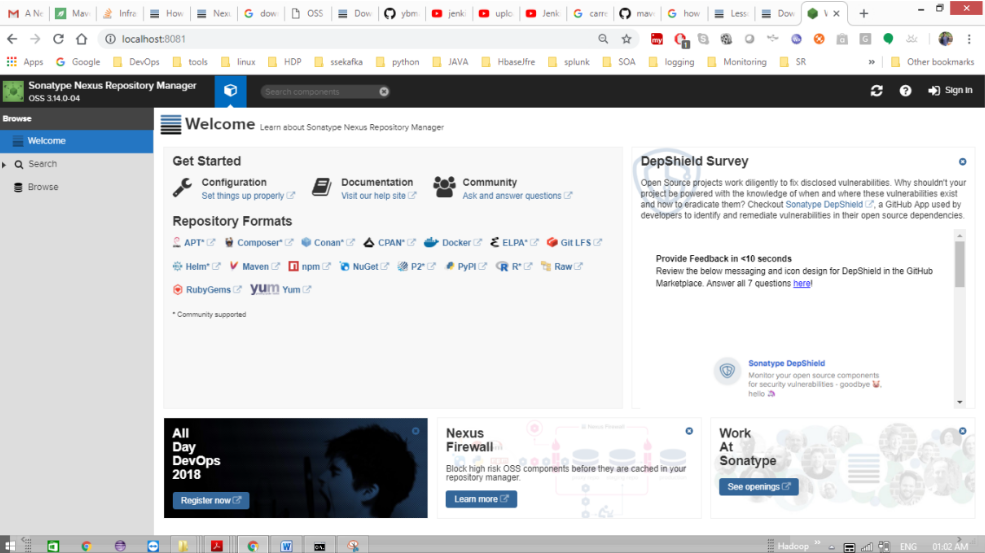
If it opens successfully, then open the dashboard sign of the Nexus repository. You can see the signboard in the right corner With a button. When you click Login, you will be prompted for your username and password, and you will be asked for your username and password.
password. By default, the username and password are admin / admin123.
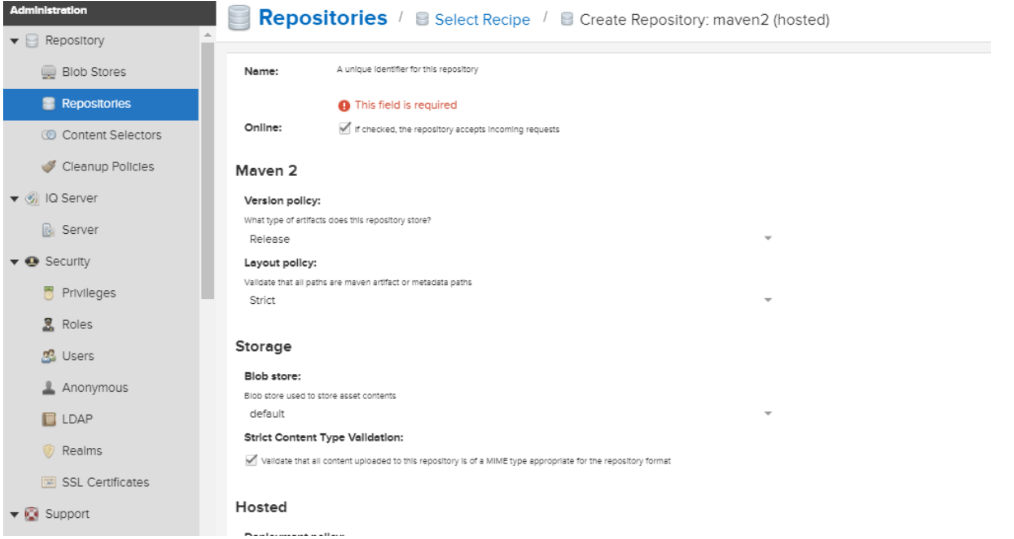
Once login successfully as an admin creates a new repository using the setting button –> repositories.

And then click the repositories option and it will open a new page like below.

Then click New Repository to create a new repository. When you click on a new repository,
Open the next page and select the move2 (host) option to create a new repository to open below
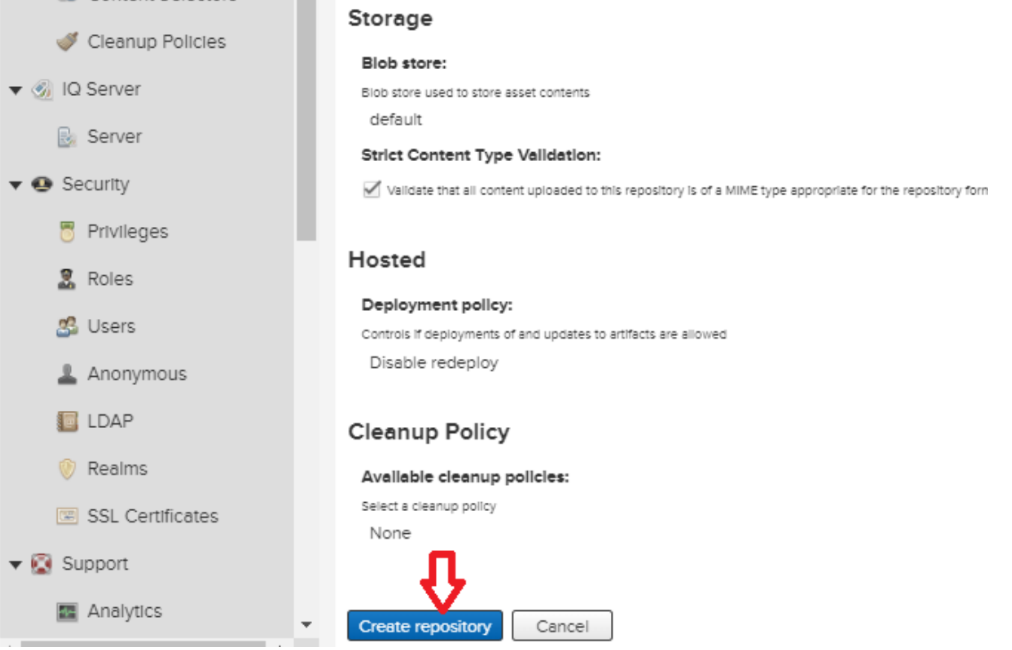
Open the page and enter the correct values required to create the repository.
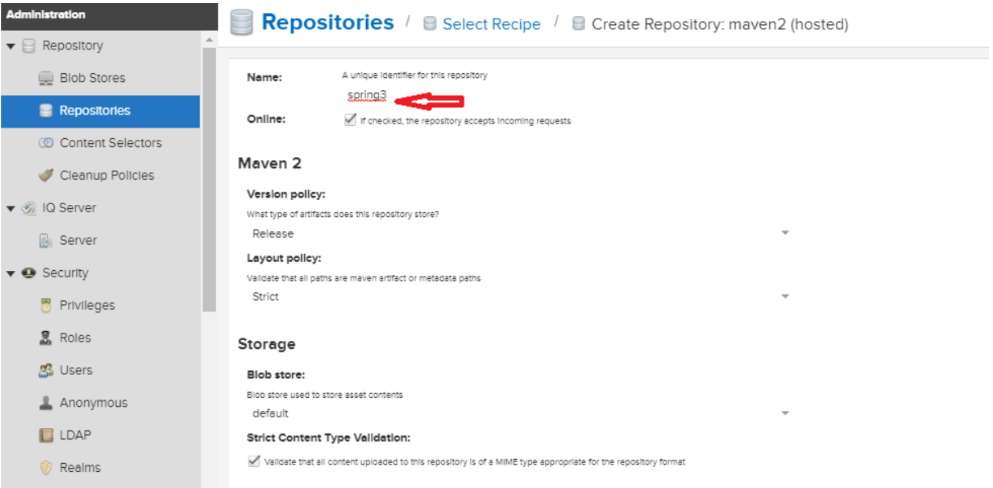
I entered the repository name as spring3 and clicked the Create Repository button at the bottom.
From now on, the default page and the rest of the options.
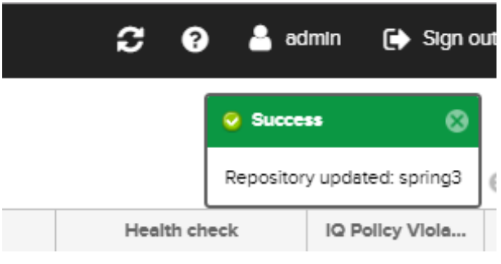
Once successfully creating a repository we will get a notification like the below.
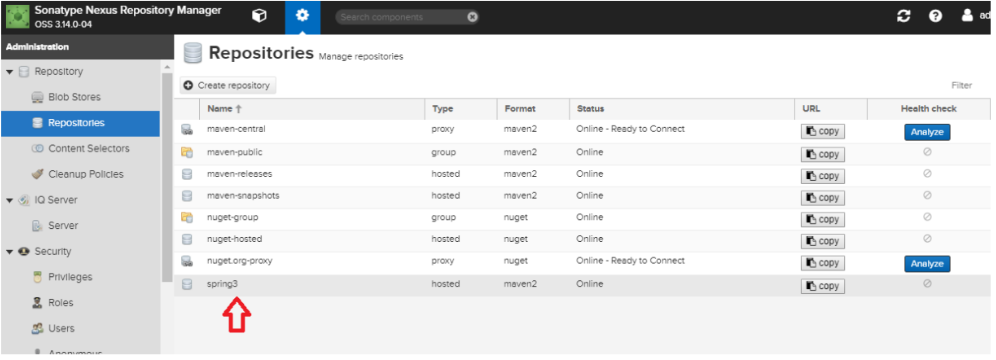
Now see the screen below our repository is created successfully.
Done our nexus configuration now open the Jenkins server and follow the below steps.
- Open the Jenkins dashboard using your Jenkins URL.
- Once open the Jenkins dashboard go to Jenkins home –> Manage Jenkins –> Manage Plugins
–> available tab –> search for Nexus Platform plugin and click the install without restart.

Note: check whether the maven is configured or not if you must configure maven before you build
the maven project.
3. Once the upload is done now configure the nexus server to upload your build artifacts. Then goto Jenkins home –> manage Jenkins –> Configure system –> Sonatype Nexus

4. Click Nexus Repository Manager 3.x Server and fill in the required columns. Then add the Nexus server credentials to Jenkins. The default credentials for the Nexus server are:
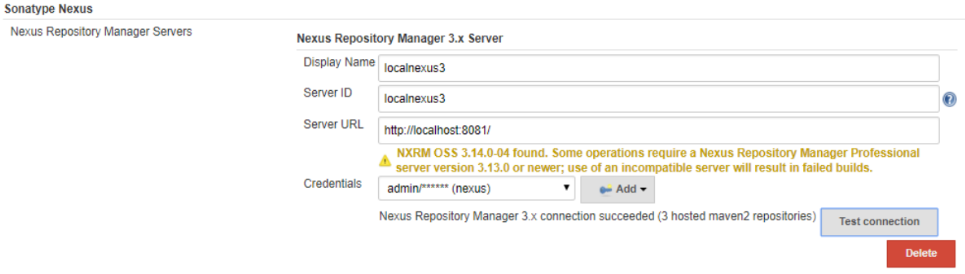
admin / admin123. After adding the credentials, use the Test Connection button to test the connection.
If successful, continue with the steps.
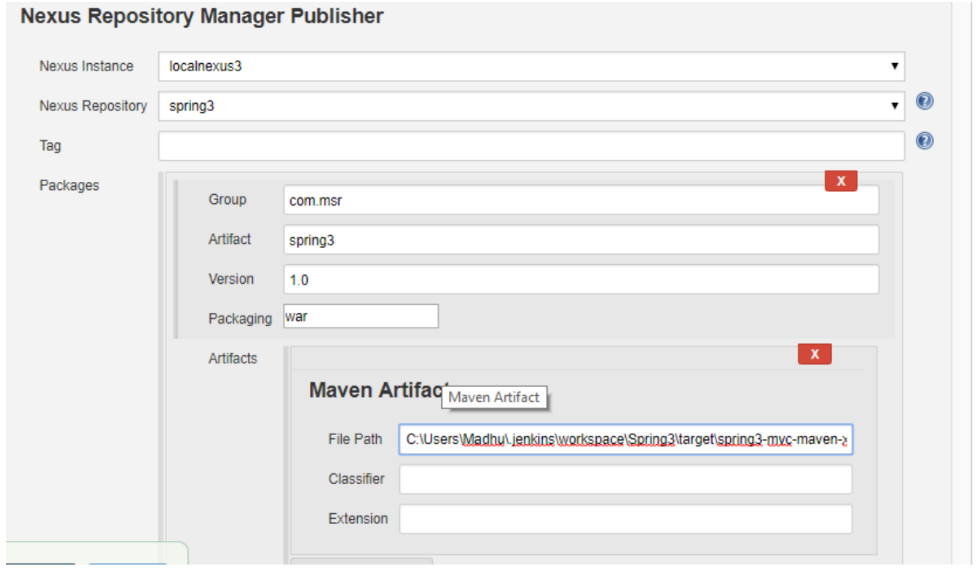
5. Next, publish new artifacts about Jenkins to your Nexus server. Go to your job
Nexus Repository Manager In the Publisher build phase, select a configuration and specify what you need.
Parameter.
Note: The Nexus OSS version tag option does not work as it is only available in the Pro version.
6. If the upload to the Nexus repository is successful, you will see the following log console output:

7. Lets verify the our artefact in nexus repository.
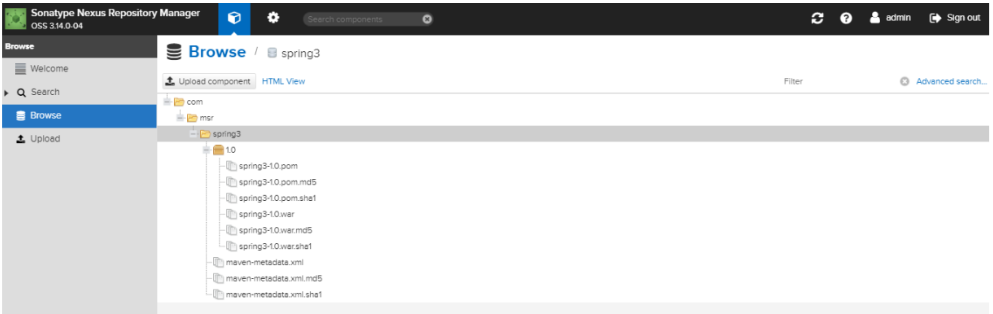
Yes it’s successfully uploaded that’s it you’re done.
Agenda:
- At first, Install the Nexus server on your Windows computer
- How to run the Nexus server
- What you need to know to create a repository on Nexus Server
- How to install Nexus plug-in (Nexus platform plug-in)
- Jenkins configuration of Nexus server
- How to test the Nexus server for configuration issues
- How to configure Nexus properties in Jenkins jobs
- Check the console output for the result of the job, regardless of whether the artifact was pushed successfully.
- Check for artifacts pushed to different versions of Nexus servers